Norway Drone Adventure
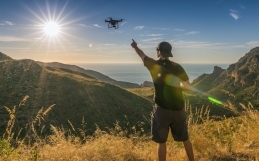
Norway is another place that was high on the drone list, I had seen pictures of Trolltunga back in 2014 from an Australian traveller whom I met in Colombia, it looked incredible, definitely one of those ‘bucket list’ places. The other two places I had seen on social media a few years back were KjeragBolten and Preikestolen, so knew I would be getting next level footage if I could capture those.
I actually wanted to visit Norway last year but was in Central America without a drone (that’s another storey!) I could’ve gone around May 2016 just before things started to get busy for the Summer. In retrospect I think I should’ve as the weather might’ve been better and I would’ve had my Phantom 3 for superior image quality!
Again much like Iceland I hired a car from the airport used Google Maps on my mobile phone as a navigation device. I pre-downloaded the South-West region of Norway onto my Phone just incase I didn’t have data. I still bought a data SIM for my phone. I purchased a SIM with ‘MyCall‘ from the ‘Narvesen’ in Bergen Airport. Also a 6GB data top-up which doubled to 12GB because of a promotion, it all came to around £25. I only used around 2GB for the whole week, coverage was excellent and fast.
I decided to fly BA into Bergen as flights were direct from London Heathrow. It was also worth paying the upgrade to Business Class for the extra baggage allowance alone, worked out cheaper! Stavanger is the other airport you could fly to if you want to visit the ‘Magic 3’.
Whilst talking to a fellow Traveller on the Trolltunga hike, apparently it’s almost half the price to hire a car in Copenhagen, Denmark. Then cross the bridge into Sweden and take the quickest route to Norway. Just do your homework on which car hire companies allow it. Obviously it’s further to drive that way, but probably worth it if your doing a few weeks. My car hire was around £400 for the week from Bergen Airport.
Below is a map of the key areas I visited. Allow for around 1 week if you want to Hike Kjerag, Preikestolen and TrollTunga. Zoom and Click on Icons for more information.
The Weather
Unfortunately I picked quite a bad week for the weather. It rained a-lot, most days in fact. You’ll find Fjordland is generally wet, especially around Bergen. It was too wet to hike Trolltunga on my first days, so I postponed it till the end of the week in the hope of clearer skies. Trolltunga was always the main priority.
Kjeragbolten
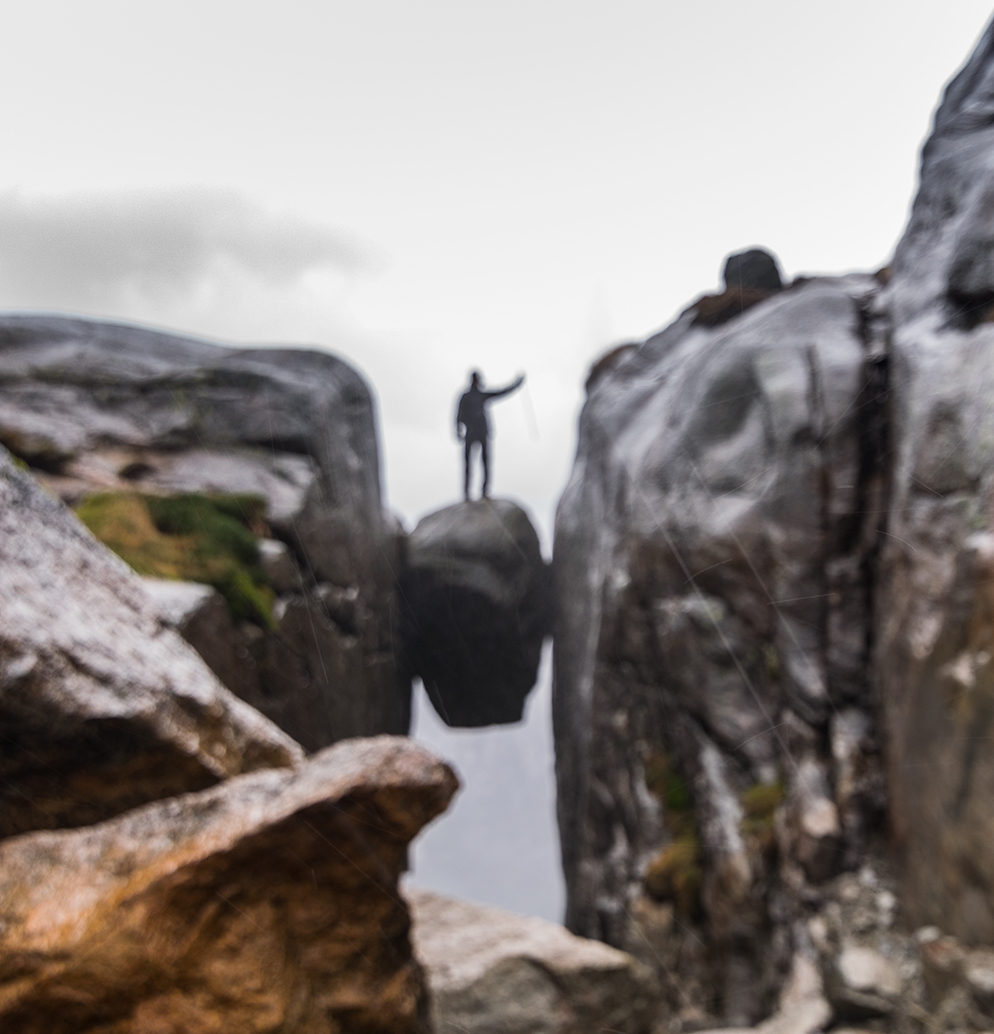
A lovely 1KM drop below. 😁
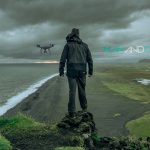
I decided to kill time and attempt Kjeragbolten regardless of the weather. I was the only one to successfully hike it on this day. Yes I know, I pulled focus (see above picture). Honestly though, hailstorm, sub zero temperatures and strong winds. At that point all I cared about was getting on the boulder and then out of there as quickly as possible. Everything was completely soaked, when your boots start filling up with water and hands start to freeze it’s not a good feeling. So obviously no drone footage here. However, I found out from the friendly Park Warden that drones are banned in Kjerag as it’s a National Park, which makes sense so it didn’t matter anyway. If you’re planning on hiking Kjerag then follow the ‘Kjerag Tourist Facebook Page‘ for latest weather and safety information. Only those with permission from the local authorities will be allowed to fly drones.
If you want time to prepare or recover after hikes in Kjerag then I recommend staying in Lyseboten, which I have marked on the map. The hostels there a decent enough and well equipped.
Preikestolen
Next port of call was Preikestolen which has fast become one of Norway’s most visited destinations. This is by far the easiest hike of the ‘Magic 3’. I met two Aussie backpackers at the hostel near the trailhead and we all had the same plan to hike early for sunrise. I had allowed for a day before to dry all my wet gear from Kjerag, the hostel had a great little drying room.
We left at around 5:30am and it took us roughly 90 minutes to reach Pulpit Rock in the dark. Usually you allow for a 4 hour return during daylight hours. The rain was supposed to have stopped by now, but it continued. The rain came in small bouts, so I decided to stick around and wait for it to clear but with no luck, so no drone shots unfortunately.

Instagram @SamLord Chilling on Pulpit Rock
TrollTunga
The biggest of the 3 hikes! The weather had cleared and it was a beautiful last 2 days to my trip. This hike is 11KM each way, so if you’re planning on doing it in one day I suggest you aim to start hiking around 8am. I planned to camp by the Troll’s Tongue so I could capture Sunset and Sunrise. As hikes go I found it in the intermediate range of technicality. The first 1KM is steep, after that it levels out and there’s a few more KM’s of up and down before reaching less steep terrain. What made if more challenging was the fact I was carrying around 15+KG (35-40 lbs) of camera and camping gear. It had also snowed in the previous days and although was beginning to thaw out, there were plenty of icy patches making the last 2km interesting in places.


I made it to the tongue with at least an hour to spare before sunset. I left around 10am but had to hike back to the car around the 0.7km mark as I left the drones propellers in another bag. With so much equipment needed for camping it’s easy to become distracted by other things. Much easier doing these things as a team and sharing weight and responsibilities. Thankfully now with the release of the Mavic Pro, Mavic Air and similar drones, hikes like these will become far easier.


Camping wise it was a fairly cold night somewhere between -7 to -10 °C, so if your planning something similar make sure your equipment is up-to the conditions. The walk back the next day was slow mainly due to lack of calories and heavy gear was taking it’s toll on old injuries, thankfully I had company on the way back down with two other campers which made the journey far more pleasurable.

Equipment Check. Phantom 3 Stayed home as it was broken.
With special thanks to @adventure.man.dan on Instagram for the spare mirco SD Card.
All my Gear : https://kit.com/mananddrone
Drone Settings Phantom 4
Colour Profile : Art, Cine or None | Custom | Sharpness 0 | Contrast -1 | Saturation 0
White Balance : Custom 5600
Shooting Mode : NTSC, 4K @ 30 FPS
ND Filters : PolarPro Professional Series – ND8, ND16-PL, ND16, ND32 + Cinema Series. Get yours now at: https://www.polarprofilters.com/ use code ‘mananddrone20’ to receive 20% off.
ISO : 100
Shutter : 60