Learn How to Create Epic Dronies (Drone Selfie)
I’ve put together another tutorial explaining how to go about filming a ‘Dronie’. (Selfie with a Drone)
Intro
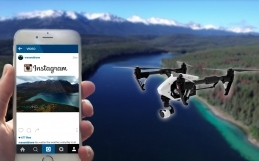
I first started doing dronies back in June 2015 after seeing someone on Instagram do one with a Phantom 2 in Miami.. These reveals / dronies if done correctly are sure to impress anyone that watches. It’s something else we can add to our cinematic collection or just for fun to impress your friends.
This style of shot is actually easier than you think to master. So let’s look at what you’ll require to achieve the dronie:
- Drone <— Obviously…. Phantom 2 and above or their equivalents if your drone make isn’t DJI
- An Open Location with clear line of sight – I can’t stress how important this is.
- Steady Hands
- Courage / Confidence
- Several Practice Runs (plan battery usage) Try to choose somewhere open and clear of power-lines, air-traffic, telephone lines, trees, wildlife such as birds. Be aware of illegal fly-zones and height restrictions in your area.
The Steps to Dronie
Step 1) So – After all your pre-flight checks. Take-Off the Drone with GPS Mode and position it slightly above head several metres in front of you, camera facing you.
Step 2) Make sure the camera angle is tilted at a slight angle. Try 20 degrees tilted down from straight. Adjust as necessary depending on your location, and proximity to yourself.

Step 3) Final Check for any unexpected problems, i.e. birds and weather, make sure wind conditions are as calm as possible.
Step 4) Hit that video record Button.
Step 5) NOW WE’RE READY TO GO!… Engage Throttle-up and Pitch-Down Simultaneously in a calm manner (Controller Mode 2). Go half to full throttle and full pitch down. Have confidence in your drone’s ability..it will go far over water and land.. Stand-Still and refrain from moving from these controller positions and keep your hands steady. Eyes on the drone and keep checking the VDU for reference of what your capturing. Send the drone out as far as you can so you have more footage to work with.
Step 6) Bring the Drone to a halt once your happy with what you’ve captured. Bring the drone back to the home position and repeat again if you think you can improve upon the first attempt.

Using Waypoints
The other method for capturing a Dronie and one that gives us the freedom to move around or make it look completely autonomous is to use the Intelligent Flight Modes. We do exactly the same as steps 1-3. But change our flying mode to the intelligent one.
Step 4 ) We are now looking to prerecord our flight.. so set the drone’s home point as A by default it should be “C1” on the controller. “C2” Button will delete any waypoints.
Step 5 ) Once you are happy with the waypoint positions. Return the Drone back to it’s home point. Set the speed slider to around 10 m/s. Remember to hit the video record button before it reaches the home point as it will fly away as soon as it arrives, be ready!
Step 6 ) Do something creative here before the drone fly’s away.
Step 7 ) Once the route has been automatically flown. Switch back to P mode on Phantom 3 or Sports Mode Phantom 4. and bring that drone back home.
Editing our Dronie Clips in Adobe Premiere CC

We can utilise Premiere CC’s powerful plugins to help with our creations. Two plugins that significantly help are: ‘Warp Stabliser’ and ‘Time Remapping’. Check the video tutorial from 09 mins 21 secs onwards for a more detailed explanation and run through.
All my Gear : https://kit.com/mananddrone