Speed Up Your Editing Workflow
Introduction
I’ve put together a video tutorial on Editing Workflow and how we can optimise it for increased productivity as the 4K footage from our drones can be quite hardware intensive.
If you have a properly tuned post production workflow then the amount of times you’ll recompress an intermediate video should be zero or once. The most common scenarios are recompressing assets like intros & motion graphics & our already compressed drone footage once they make their way into a final program.
Not all of us have the luxury of the latest super fast computer and sometimes we’re limited to laptop machines if we’re on the run, so we have to make the most of what we have.
If you’re a beginner or novice to the post production scene, my advice for you is that it may be worth picking ‘one’ software package now and sticking with it going forward.
These are the packages I recommend for the Following Platforms :
Apple Mac
- Final Cut (Fastest and easiest to use, cons : has least options as standard, requires a-lot of additional plugins to unlock functionality such as colour correction, VFX and batch exports.)
- DaVinci Resolve (Fast if have good Mac with dedicated GFX, Best options for colour grading. Cons : VFX integration.)
- Adobe Premiere CC (Best all-rounder has good effects integration, cons : Slower exports, expensive.)
PC Windows
- Adobe Premiere CC (Great All-Rounder, cons : slow workflow, expensive.)
- DaVinci Resolve (Great Colour Correction, cons : VFX integration.)
- Edius Pro 8 (Fast Renderless 4K Workflow, cons : lack of VFX, PC Only.)
Adobe Premiere CC is my main choice even though I’m on Mac. Adobe have recently improved performance for all Mac OSX users using 10.13 and above helping reduce render times. I also prefer Adobe Premiere because of it’s integration with Adobe After-effects and Adobe Audition. It may be an expensive subscription based software, but it’s still the best all round editor in my honest opinion.
Workflow
HVEC (High Efficiency Video Coding) h.265 is the newer current standard to which things are moving over to in terms of quality and file size and as a result we’re seeing our mid-range consumer drones favouring this option to give us the best possible quality given the price point. However even with a computer only a year or two old, h.265 can still be taxing on our hardware especially the CPU. It requires a-lot more computation compared to it’s older h.264 sibling.
The h.265 clips from drones can really slow down our editing workflow so we need to create a much faster workflow for editing.
Obviously the simplest solution for a faster workflow is to purchase a faster computer, however this isn’t an option for a-lot of people so we have to make the most of what we have.
Side-note : If you are in the market for a new Mac then you will benefit greatly from any new computer featuring Apple’s ‘T2 Chip’, this chip can drastically improve HVEC render times utilising programmes such as Final Cut & Compressor.
If you want to build a custom PC then I highly recommend the AMD Ryzen ThreadRipper CPU and their latest 7nm GFX Card.
There’s 2 main solutions for mitigating slow HVEC h.265 workflows (and h.264) that I want to cover:
1) Transcode all our clips beforehand into either : ProRes 422 HQ, DnXHQ 10-Bit or Go-Pro CineForm.
2) Create Proxy files to our h.265 clips.
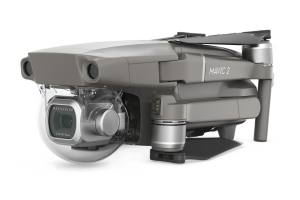
My favourite and the way I now operate is method 1. Why? Creating proxy files may speed up the workflow but the original files are still h.265 (as I’m shooting with a Mavic 2 Pro) so the hardware still has to decode and re-encode those files, it’s just covering up the inevitable slow Final Render. Try exporting a 3 minute h.265 workflow with scores of clips, effects and colour correction applied, it will take a while.
If we transcode all our footage into Lossless 4:2:2 right from the get-go we minimise any further quality degradation within our editing and final rendering with the aim to also speed up our editing timeline.
If you’re a Mac user, you will benefit greatly from converting every clip into ProRes as Apple favours this codec and encoding becomes much faster.
If you’re working from a PC then I recommend DNXHQ or GoPro Cineform, both nice codecs to work with and offer similar lossless capabilities to ProRES.
When we talk about ‘Lossless’ the aim is to use a codec that gives virtually none to very little degradation to our intermediate video clip in our case the drone footage.
Okay so how do we transcode our drone footage?
I’m going to suggest 2 methods. My favourite is via Watch Folders in Adobe Media Encoder as a batch process. The 2nd option is for Final Cut Users and it’s via Compressor for Mac.
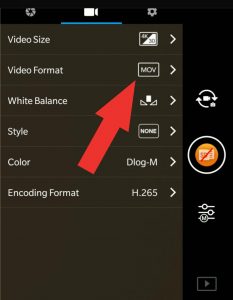
It’s important to note that if you are using Mac then make sure you encode with .MOV on your drones APP as Compressor can only use .MOV in drag&drop mode.
In essence we want to convert to a ‘Lossless’ format such as : ProRes, CineForm or DnXHQ to retain as much information as possible from the original drone shots whilst preventing further clip degeneration.
Our computers will have a much better time decoding any of these Lossless formats rather than the hardware taxing h.264 and more importantly h.265. Thereby improving our productivity when editing a video.
This should be the stages for Workflow :
Raw Drone Footage > Lossless Transcode 422 or greater > Edits Colour etc > Final Output.
or
Raw Drone Footage > Proxies > Edits Colour etc > Final Output.
For something as small and compressed as the Mavic 2 Pro’s footage we really don’t need anything greater than ProRes 422 HQ, CineForm 10-bit, DNxHQ 10-Bit, the important take away is that it’s 10-bit for 10-bit so we retain that latitude in colour correction.
To Maximum Bit Depth or Not? That is the question. This is a bit of a grey area from the standpoint of even Adobe’s own documentation. What I’ve found out is if you do edits to the Transcoded 422 you can see the quality difference in terms of ‘Maximum Bit Depth Checked’ vs ‘Unchecked’. Some of Premiere’s effects support 32-bit YUV and so having the option checked will make better use of Premiere’s high bit rate functionality at the cost of increased Render Times.
Either way you are still left with a 10-bit video file providing you chose ProRes 422 or 422HQ.
I’ve found the difference in file-size for the “Maximum Bit-Depth” option to be negligible in some cases or little difference. I will tick this option for my Final Output when working from Adobe Premiere. If you want to tick this for your Transcodes then that should be fine too.
Please refer back to the video for demonstration on how to Transcode our footage.
Extra Storage
Obviously with doing all these transcodes to lossless format requires a lot more hard drive space and we don’t want to fill our main hard drives (make sure you keep a decent amount of GB free for scratch / cache). So we should look for extra storage space in the form of external SSDs as old style mechanical drives aren’t fast enough to edit our transcoded footage.
I personally use the SanDisk SDD Drives to edit from if necessary. They are plenty fast enough to handle 4:2:2 read and write speeds and now thankfully much more affordable than yesteryear, perfect size for travel too. Purchase 1TB SanDisk Drive Here : https://amzn.to/2JZZ4bv
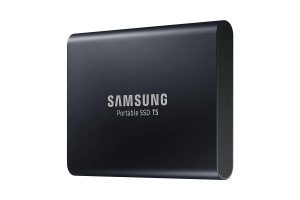
Another great reliable alternative I recommend are the Samsung T Series Portable SSD again a nice price point and ultimate portability. I’m buying them up because the difference is night and day over old fashioned mechanical drives. Purchase Samsung SSD Here : https://amzn.to/2B4gp0d
Common Newbie Misconceptions
If I’m converting my drone footage right away to something like ProRes 442 HQ before any editing I’m increasing the quality of my video clips. WRONG : We’re doing this in order to minimise further degradation to our clips in post production and final output.
Once I’ve transcoded my footage from h.265 to CineForm, DNXHQ or ProRes it will work fine and play smoothly on my computer.
WRONG : You still need a fast enough computer. For 4K Footage you want to ideally aim for an Intel 7th or 8th Gen i7 with dedicated graphics of Nvidia 1050 Ti and higher. Your hard-drive should also be a NVMe PCIe SSD ( Solid State ) with sequential read and write speeds over 550MB/Sec, preferably 1/Gbit a sec and over.
Still Getting Drop Frames?
After Transcoding your footage to our Lossless format and you still experience a sluggish workflow, then you may still have to create proxy files for all your clips. Yes this adds even more time having to wait for these to render but it usually doesn’t take too long.
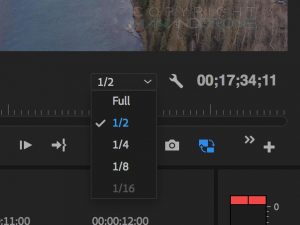
Before committing to Proxies, have a look and see if changing the clip quality in our previews makes any difference first. Try 1/2 & 1/4 resolution respectively. If that doesn’t make a difference then we need to create proxies.
Please refer to the video tutorial on how to create proxies.
I hope that’s given you a valuable insight on how things should be done with our drone production workflows.
I’ll be releasing similar tutorials such as best settings for encoding with Premiere for YouTube, Vimeo, Instagram so pleased stay tuned.
All My Gear with Clear Rationale : https://kit.com/mananddrone
Be sure to follow me on all my social medias to learn of new videos & tutorials. Cheers!


