Learn How To Colour Grade Your Drone Footage
I’ve put together a tutorial on how to colour grade your DJI Phantom 3 and Inspire X3 Footage. This tutorial isn’t limited to those drones as you can carry this knowledge across most drones with similar HD cameras. You would see some great results when using the Zenmuse X5 and X5R Cameras here.
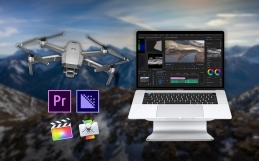
The tutorial covers the basics within the ’Lumetri Colour System’ now built into Adobe Premiere CC. Similar colour grade systems are also available for Final Cut Pro and Davinci Resolve 12, so you can apply similar logic from this tutorial to those applications.
Tailoring to our Audience
- What’s this project for? Is it going to be a marketing video for a business? Or a cinematic masterpiece for YouTube? Vimeo?
- Correcting any overexposure issues as best we can should be a high priority
- Correcting any underexposure issues (dark footage)
- Creating Consistent colour grade across our entire sequence
- Try to keep RGB values as even as we can
- Subtle adjustments to not overcomplicate things
- Keeping our filters to a minimum (saves massively on render times)
Fine Tuning Our Colour Grading

As stated within the tutorial we can add things like gradient masks to certain parts of our images i.e. the sky. For this we need to allow for more time. It will also help if you have a fast computer. (See Computer Spec Sheet Below). Adding an adjustment layer or rectangle mask to create a warm highlight effect is a good compromise though.
What we can also do is reduce the amount of video noise we see with Plug-Ins such as “De Noiser II” or “Neat Video” both of which are supported for Premiere and Final Cut. I did not cover this as my system isn’t fast enough and it falls under the intermediate to advanced category so I’d rather have beginners focusing more on getting colours right before thinking about heavy plug-ins. I’ve mentioned the options here for those fortunate enough to have powerful computers to try this out. Both good options with “Neat Video” being the faster of the two.
Colour Grading Summary
Proper colour correction done by professionals can be an art-form. Some of it’s subjective but there are industry standards we should use as our basic guideline. Do try and create your own look if your creating something cinematic, Hollywood loves to go through trends such as the “Teal & Blue” look. Keep it subtle, simple and professional.
Adobe Premiere CC Trial here : http://adobe.ly/1nyA9bz
Final Cut Pro Trial here : http://apple.co/1ocnLl4
Davinci Resolve here :

Kit I fully endorse : https://kit.com/mananddrone